


Getting Started with Android Things - Google’s new IoT platform
2017-01-12 | By Maker.io Staff
Android Things is an IoT platform by Google, that lets users build IoT connected devices using Android APis combined with the Google Cloud Platform. The platform “Android Things” builds upon is predecessor “Brillio”. The Android Things is currently available for a number of platforms including the Raspberry Pi 3. Unfortunately, the documentation online is somewhat a little sparse for the average user hence why I’m writing this short guide to show you how to get started and write your first program, which will blink an LED. Ultimately this is out hello world example.
Why should I use it?
First and foremost, Android Things is a full OS, you don’t get the applications that you might see on other Android devices such as your phone or tablet but they are running on the same UI toolkit that is available for Android Things. What this also means is that if you are an application developer then you will be using a programing language that you will be familiar with, Java. This is very similar to that of Windows 10 IoT Core, which has been available for quite some time now.
At the moment the Android Things OS will run on the Raspberry Pi 3, Intel Edison/Joule and the NXP Pico platforms. All three of these development boards are fairly powerful IoT devices with the Raspberry Pi 3 trumping both the other boards in terms of raw processing power. For this example and for the exact reason that the Pi 3 is more powerful than the other boards I will be using the Raspberry Pi 3.
Getting Started
Firstly, head over to the Android Things website and click on the “Get The Developer Preview” and then under “Flash Android Things” click the Raspberry Pi 3 link.
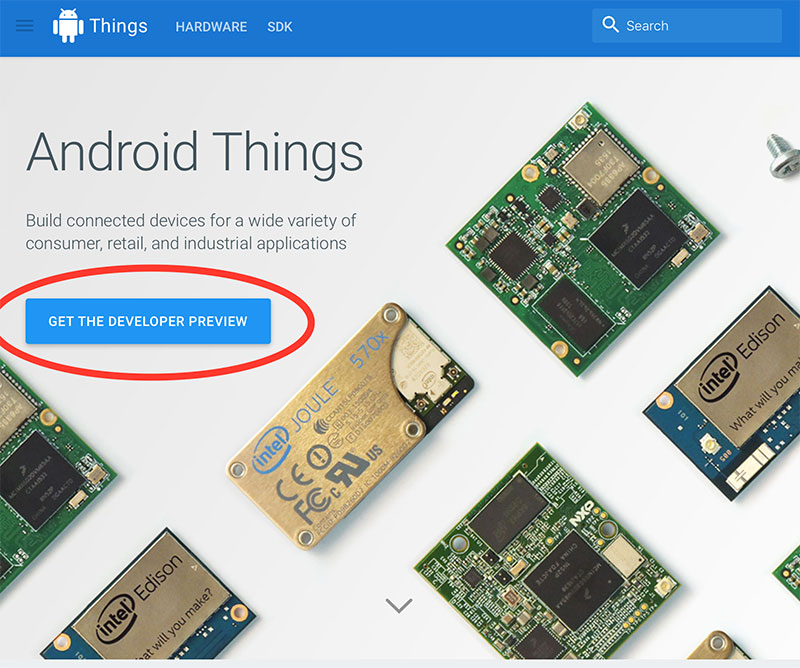
Android Things Home Page
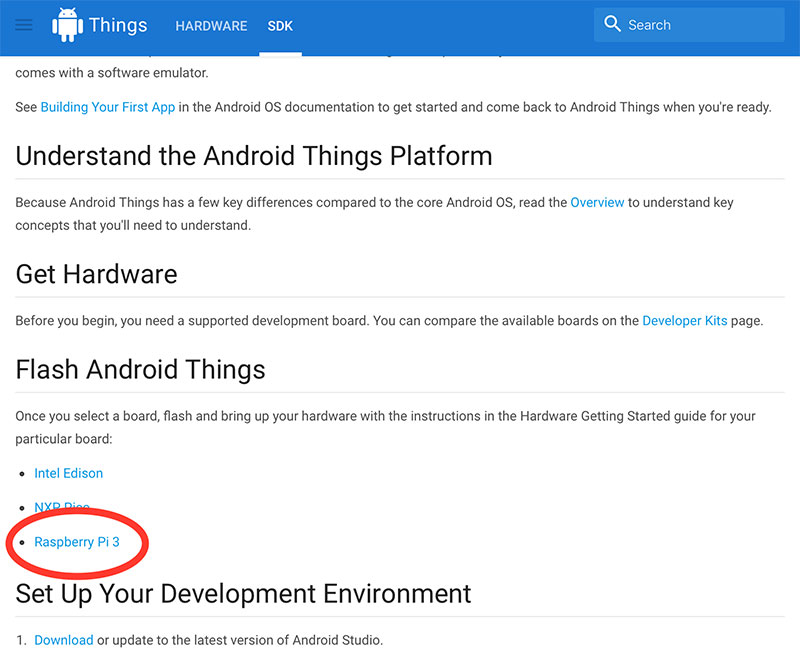
Select your development board
The next page will you a quick start guide to flashing the Android Things OS to a DVD or thumb drive. Click on “latest preview image” and here you can download the Android Things OS image for the Raspberry Pi.
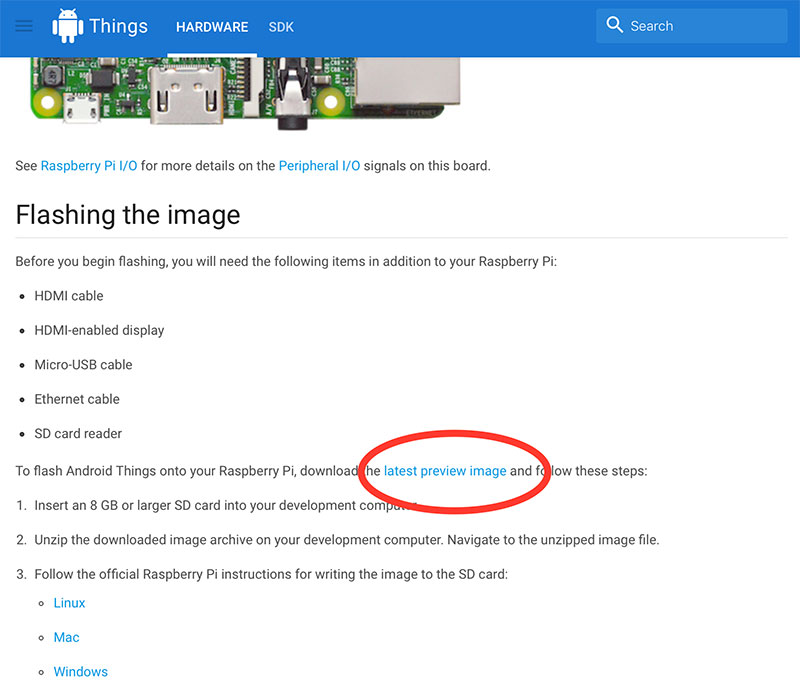
Get the latest preview image

Download the image for the Raspberry Pi
Once downloaded, unzip the file and then open up a image flashing software such as Etcher (MAC) or WinDiskImager32 (Windows) and follow the on-screen instruction to flash the image file to a MicroSD card.
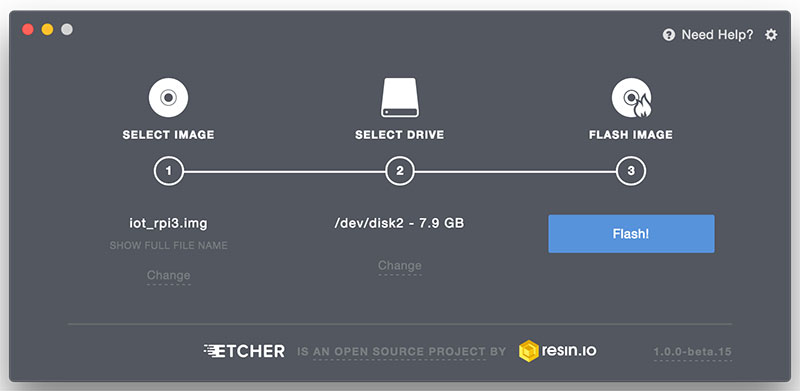
Flash the Android Things Image to a MicroSD card
Once you have the image flashed, you can then boot up the Raspberry Pi. Insert the MicroSD card into the Pi and then apply power to the board. If you do have a HDMI monitor, then you can also plug this in to confirm that it is indeed working. Note however that the official Raspberry Pi touchscreen does NOT work with Android Things OS. After a few seconds of applying the power you should see the Android Things splash screen.

Android Things Splash screen
At this point you can connect your Ethernet cable from the Raspberry Pi to your router. This is by far the best way to connect to your Android Things board but also the ONLY way in which you can setup a WiFi connection. Hopefully this will change with future versions of the OS.
Android Studio
To work with Android Things, you will need to download and install Android Studio, which is available on all platforms. The program that you will create are standard Android programs with the addition of the Things library support. Head back to the “Getting Started with the SDK Preview” page and under “Set Up Your Development Environment” click the download link.
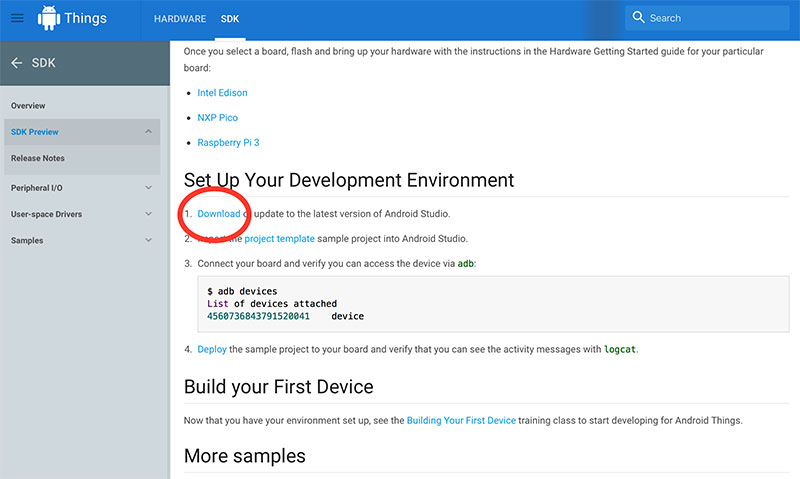
Click download link
From here you can just hit the “Download Android Studio” button, the web browser should automatically detect your current OS and give you that selection.
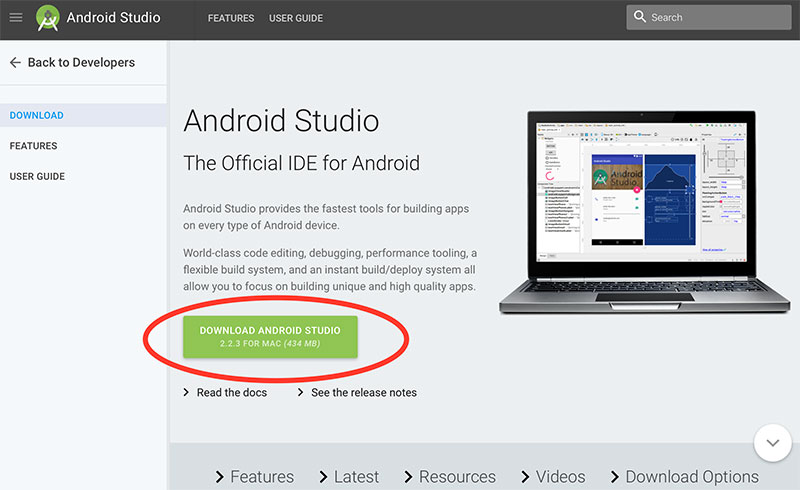
Download Android Studio
Once downloaded, open up the .dmg file and install the Android Studio with all the default options. The installer will then proceed to download all the dependencies that it requires. Do not worry if it doesn’t install the libraries that we need because it will automatically prompt you to download this if your project requires them and it will give you the option to install them, which I will show you later on.

Install Android Studio
There are a number of ways in which you can setup the new library and the necessary Gradle configuration, but by far the easiest way is to use a project template, which has been provided as an example from GitHub. Download the template from GitHub and extract the files to your Android Projects directory.
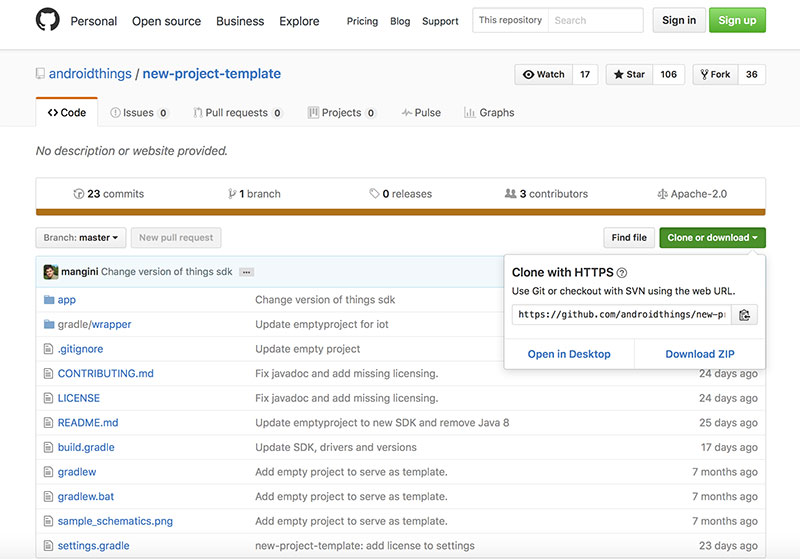
Download the Template
Once downloaded open the Android Studio and select “Open an existing Android Project” and locate the template file you unzipped previously.
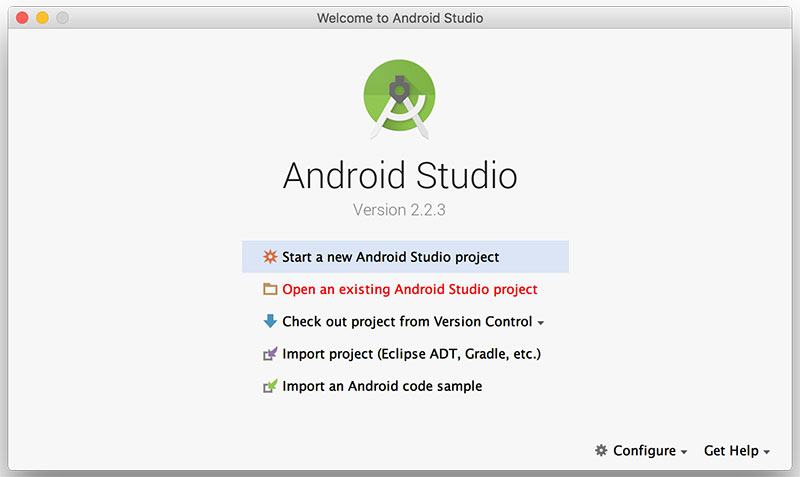
Open a Previous Project File
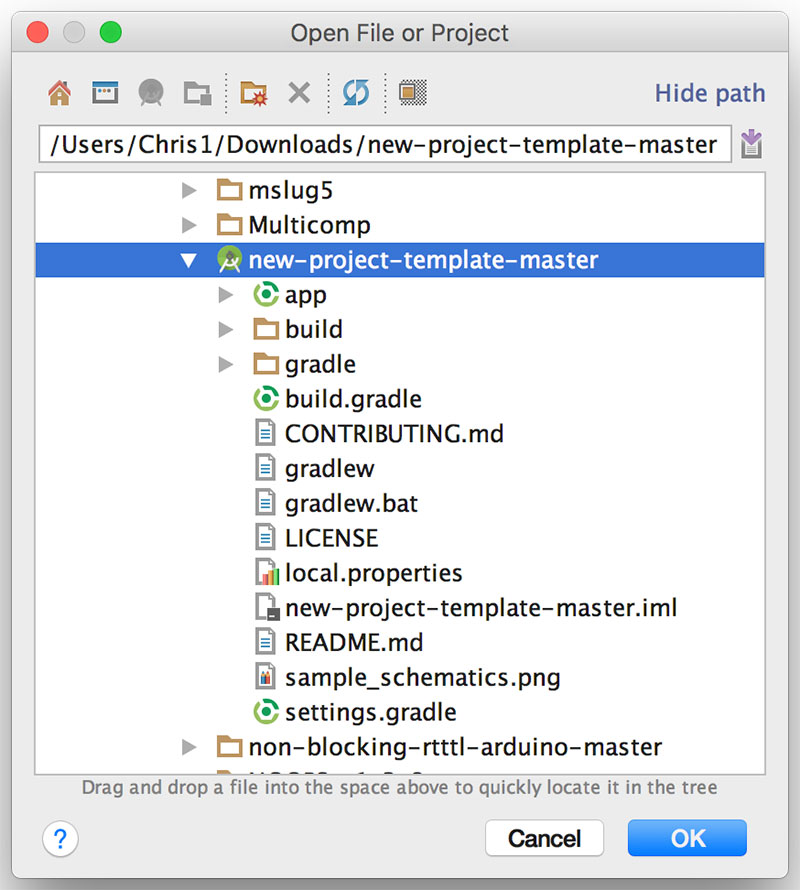
Select the Template File
Once opened it would be a good idea to test the build to make sure that there are no issues running the application on the Raspberry Pi. Currently as it stands you will encounter a number of errors if you try to build the application, this is because you need the Android SDK and tools. Simply click the link to fix the problem and then try again after the SDK has been downloaded. Eventually you should get a clean build to run.
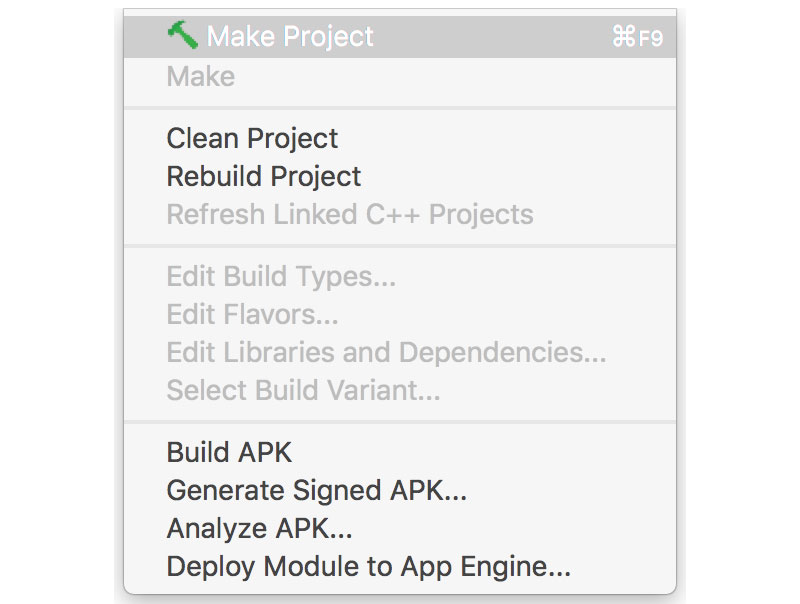
Build the Project
Now that the Build was successful we need to connect the device (Raspberry Pi) to the Android Debugger. In the Terminal Window type the following command, replacing the IP address with your devices IP address:
adb connect 192.168.1.143
If you receive an error when running the command such as “Command not found” then you will need to find the tool in the Android SDK and run it from the directory. You can do this using the following commands:
cd /users/(username)/Library/Android/sdk/platform-tools
./adb connect 192.168.1.143
You should see an output in the terminal window which says:
connected to 192.168.1.143
This indicates a connection to your Android device. Something to note is that sometimes the connection can be lost due to either a network timeout or a bug in the daemon. Once you have established the connection you can go ahead and try running the empty project on the Raspberry Pi. After it compiles, which may take a while it will prompt you to select a device for it to run on.
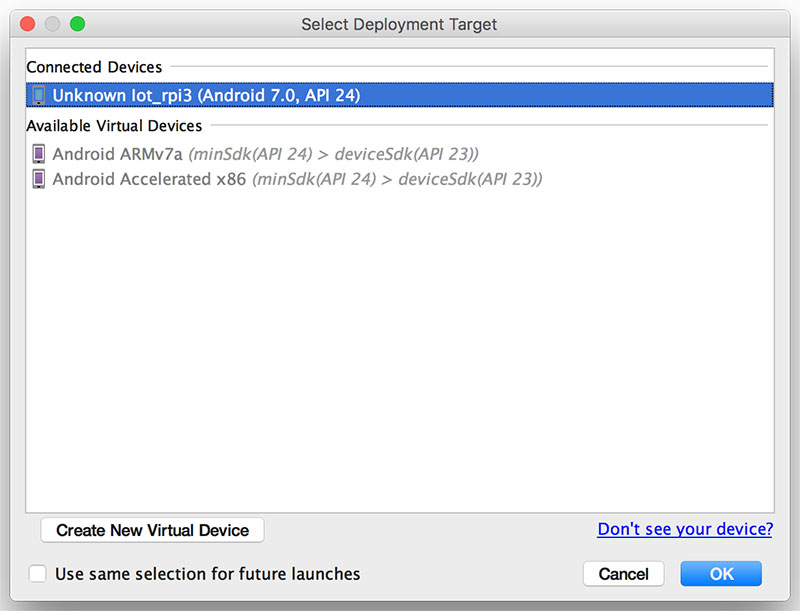
Select your Android device to run the application on
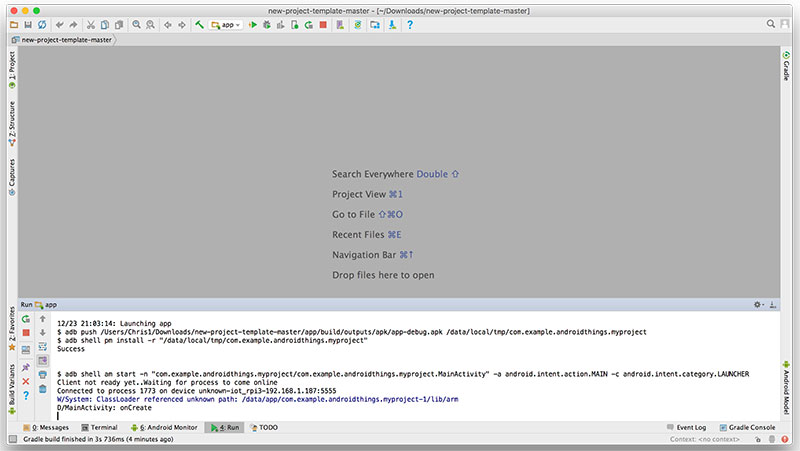
Project successfully run
If you have a monitor connected to you Raspberry Pi then you should see a blank white screen as the interface. If it doesn’t work then try restarting everything and try again, sometimes the whole process can be a little buggy and temperamental.
Controlling Simple GPIO States
All we have to do now in order to program the GPIO pins on the Raspberry Pi is make use of the classes available provided by the Things library. The classes to interface with the GPIO pins are PWM, I2C, SPI and Serial Bus. To use the GPIO pins you will also need to know what each pin is called and use the appropriate String identifier of that particular pin.
| BCM Pin |
GPIO Pin | GPIO Pin | 4 |
| 3.3V | 1 | 2 | 5V |
| I2C1 (SDA) | 3 | 4 | 5V |
| I2C1 (SCL) | 5 | 6 | Ground |
| BCM4 | 7 | 8 | UARTO (TXD) |
| Ground | 9 | 10 | UARTO (RXD) |
| BCM17 | 11 | 12 | BCM18 |
| BCM27 | 13 | 14 | Ground |
| BCM22 | 15 | 16 | BCM23 |
| 3.3V | 17 | 18 | BCM24 |
| SPIO (MOSI) | 19 | 20 | Ground |
| SPIO ( MOSO) | 21 | 22 | BCM25 |
| SPIO (SCLK) | 23 | 24 | SPIO (SSO) |
| Ground | 25 | 26 | SPIO (SS1) |
| N/A | 27 | 28 | |
| BCM5 | 29 | 30 | Ground |
| BCM6 | 31 | 32 | BCM12 |
| BCM13 | 33 | 34 | Ground |
| BCM19 | 35 | 36 | BCM16 |
| BCM26 | 37 | 38 | BCM20 |
| Ground | 39 | 40 | BCM21 |
Unfortunately, there isn’t any standard in labelling the GPIO pins throughout the Raspberry Pi but the table above should provide the pinouts for controlling the GPIO pins using Android Things. You may also have noticed that you cannot use the I2C or SPI pins as GPIO pins. Here is the code courtesy of Harry Fairhead over at I-Programmer:
package com.example.androidthings.myproject;
import android.app.Activity;
import android.os.Bundle;
import android.os.SystemClock;
import android.util.Log;
import com.google.android.things.pio.Gpio;
import com.google.android.things.pio.PeripheralManagerService;
import java.io.IOException;
import java.util.List;
public class MainActivity extends Activity {
private static final String TAG =
MainActivity.class.getSimpleName();
private Gpio mGpio;
@Override
protected void onCreate(Bundle savedInstanceState) {
super.onCreate(savedInstanceState);
PeripheralManagerService manager = new PeripheralManagerService();
List<string> portList = manager.getGpioList();
if (portList.isEmpty()) {
Log.i(TAG, "No GPIO port available on this device.");
} else {
Log.i(TAG, "List of available ports: " + portList);
}
Log.d(TAG, "onCreate"); try {
mGpio = manager.openGpio("BCM4");
mGpio.setDirection(
Gpio.DIRECTION_OUT_INITIALLY_LOW);
mGpio.setActiveType(Gpio.ACTIVE_HIGH);
for(int i=0;i<>
mGpio.setValue(true);
SystemClock.sleep(1000);
mGpio.setValue(false);
SystemClock.sleep(1000);
}
} catch (IOException e) {
e.printStackTrace();
}
}
@Override protected void onDestroy() { super.onDestroy();
if (mGpio != null) {
try {
mGpio.close();
mGpio = null;
} catch (IOException e) {
Log.w(TAG, "Unable to close GPIO", e);
}
}
Log.d(TAG, "onDestroy");
}
}
To break down the sections of the code, the first part of the code gets a list of available BCM GPIO ports that can be used using the PeripheralManagerService. To use this service you will also need to add import com.google.android.things.pio.PeripheralManagerService; . Once the service has been imported you can use manager.getGpioList(); to list the ports in a String “portList” and then log on the output.
PeripheralManagerService manager = new
PeripheralManagerService();
List<string> portList = manager.getGpioList();
Now that you have the list of available GPIO pins to use, you can now program the GPIO pins like you would in a normal Raspberry Pi program by setting the BCM pin number (BCM4), the direction of the pin (Output) and then the values of the pin.
mGpio = manager.openGpio("BCM4");
mGpio.setDirection(
Gpio.DIRECTION_OUT_INITIALLY_LOW);
mGpio.setActiveType(Gpio.ACTIVE_HIGH)
for(int i=0;i<10000;i++) {
mgpio.setValue(true);
SystemClock.sleep(1000);
mgpio.setValue(false);
SystemClock.sleep(1000);
When using the SystemClock.sleep() function to add delays in between values you will also need to import import android.os.SystemClock; .
Summary
From what I have learned about programming in Android Things for the Raspberry Pi is that the process and procedures are very similar to that of Windows 10 IoT, however there are much more devices using Android these days with a significant market capitol. With ever more IoT devices coming on the Market it makes sense to integrate these devices into already existing products and Android Things makes this process easier to use with its already existing services.
